SQLBackupAndFTP creates standard *.bak files when it runs locally on the same computer where SQL Server is. For remote SQL Server computer backups SQLBackupAndFTP creates backup script files (*.sql). Whenever possible, you should always opt for *.bak backups against *.sql backup files.
Here we will show you how to backup a SQL Server on the network to the standard *.bak file even when SQLBackupAndFTP runs on a different computer from where the SQL Server is. The main requirement, in this case, is that both SQL server and SQLBackupAndFTP have access to the same shared network folder.
1. Connect to SQL Server on the network
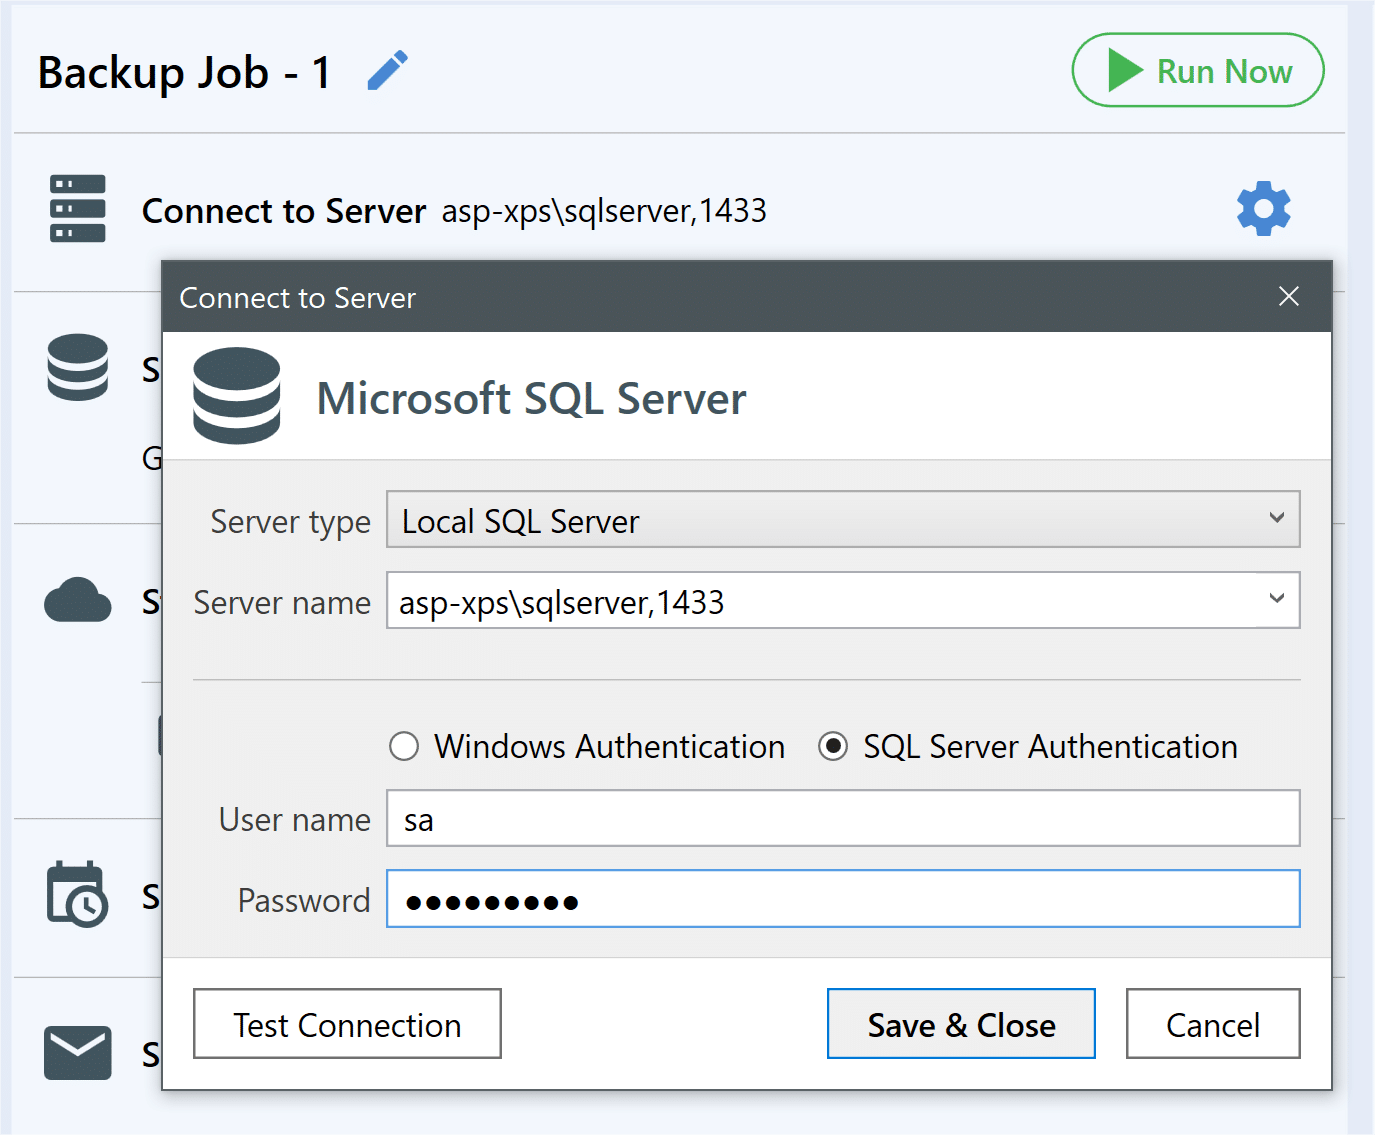
Test your connection in SSMS first – connecting to SQL Server on the network is not always trivial and is a separate subject that is not specific to SQLBackupAndFTP. Then run SQLBackupAndFTP on your local computer, click “Connect to Server”, select “Local SQL Server” as a Server type and enter the same server name, user name, and password you’ve used in SSMS.
2. Use a UNC Path as a temporary folder
Specify a UNC path (like \\myserver\shared\) in the Temporary folder section:
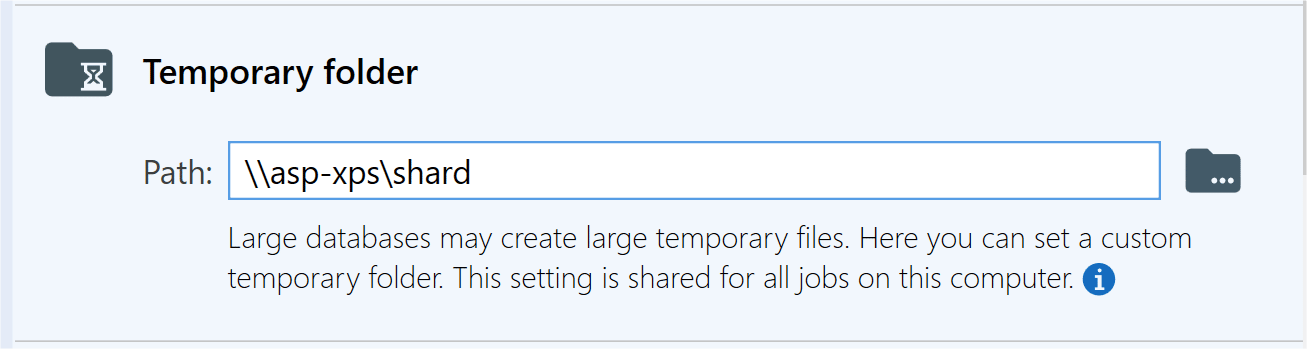
This folder should be accessible by both the SQL Server account and by SQLBackupAndFTP! Note that the remote share should only be accessed via UNC name (like \\server\share”. Mapped drives may not be consistently visible to the SQL Service.
3. Set the rest of SQL backup options
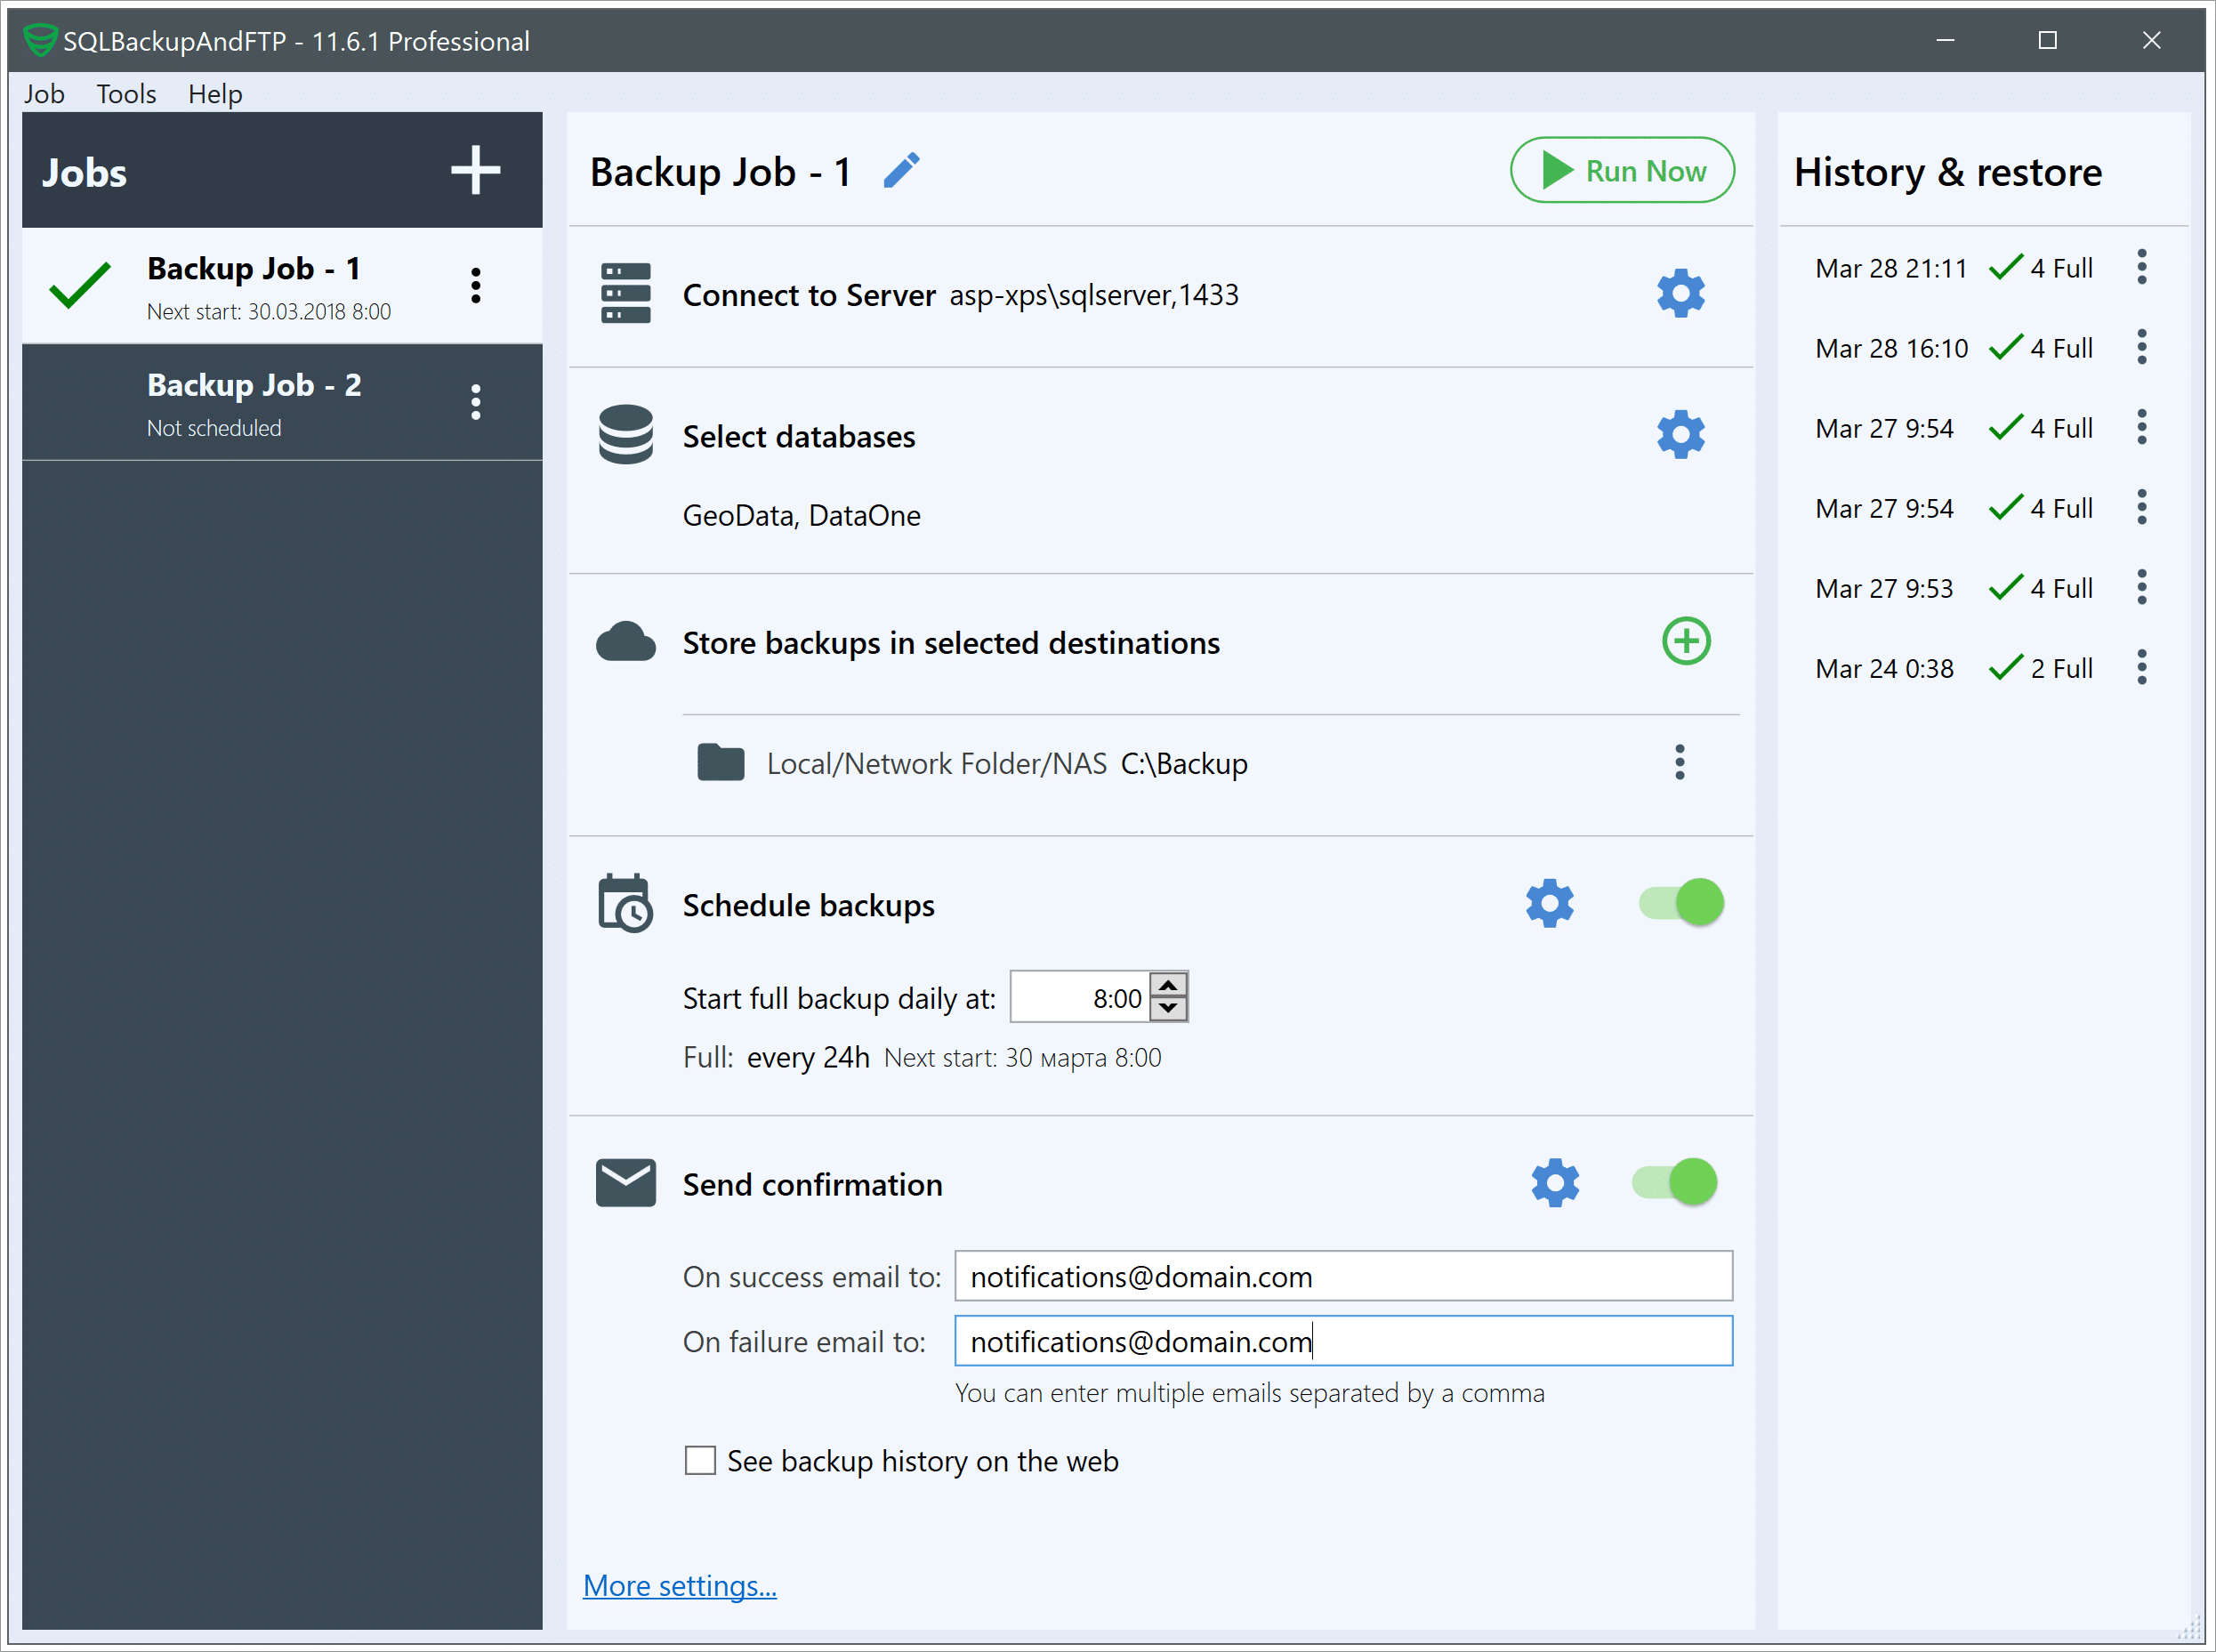
As usually in SQLBackupAndFTP select databases to backup, where store the backups (network, NAS, FTP, Dropbox, Amazon S3, Google Drive, OneDrive, Azure, etc), when to schedule Full, Differential and transaction log backups, where to send email confirmations, encryption and other desired options.
4. Run the backup
Press the “Run Now” button to test. If it runs without errors – SQL Server has enough permissions and SQLBackupAndFTP should run without issues on schedule as well.
Important – Permissions!
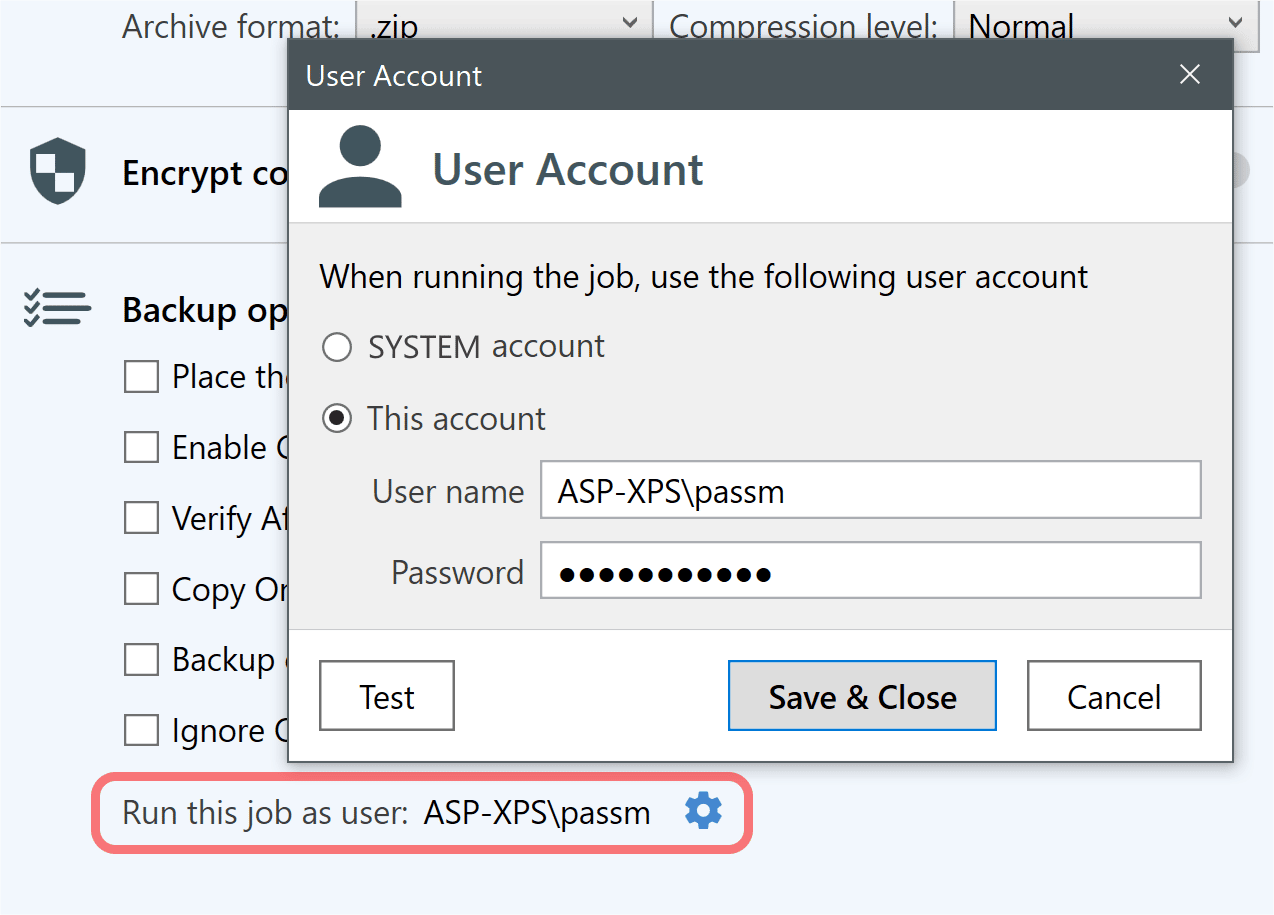
If you experience problems with this solution, most probably they are related to permissions. Chances are – you’ve used SQL Server Authentication to connect to a network server. In this case, the job is run under a local SYSTEM account, that is not able to write to the temp folder on the network. To change the main account under which the job is run – go to the section “Backups options” > “Run this job as” dialog and use the account with enough permissions to the network
We’ve just resolved the issue of SQLBackupAndFTP accessing the temporary folder on the network. But SQL Server service has to be able to write to this folder as well.
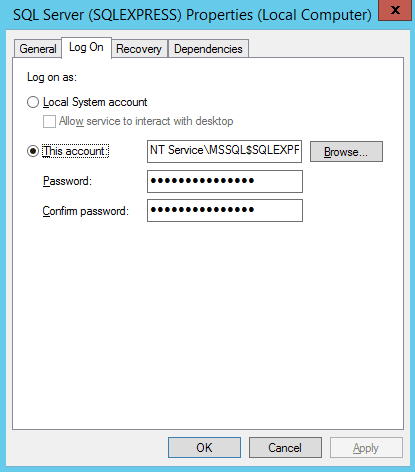
The SQL Server service on a remote server needs to run it under a domain-level account that has FULL CONTROL rights to the file system folder and to the share. SQL server often runs under “NT Service\\MSSQLSERVER” account that usually does not have access to the network. To change the SQL Server account:
- Open Services app
- Find the SQL Server service name (like “SQL Server (SQLEXPRESS)”)
- Right Click > Properties, Select the Log On tab
- Instead of Local Account, choose “This account” and specify the account with permissions as described earlier
SQLBackupAndFTP account should have the same access rights. – it is simpler if it is running under your personal account (in Advanced settings set “Run scheduled jobs as” to your personal account)
Hi ,
We have been using SQL…. for a while nice.
Now I moved the License to another server. This Server has the SQL db’s on drive D: not drive C: is there a way we can force SQLBackup (latest version now) To go to drive D ? There is some database stuff on C: but no databases, where is the setting for where to find the databases. Thank you,
David (for Gold Health Strategies, Inc.
David, please contact support: https://sqlbackupandftp.com/support
Hi, I’d like to use SQLBackupAndFTP to create a .sql backup of a local database. Can it be forced to do scripted backups?
The particular use-case is this: I have a slightly modified version on my PC of a Live database. I want to backup this modified version, and restore it to a new database on the Live server. I don’t want to risk clobbering the real Live database. I’m not a DBA so the backup/restore commands are a bit unknown, and I’m not going to experiment on the Live server.